
How to Use Customer Dashboard
Once you've Initialised Customer Dashboard for a project previously,
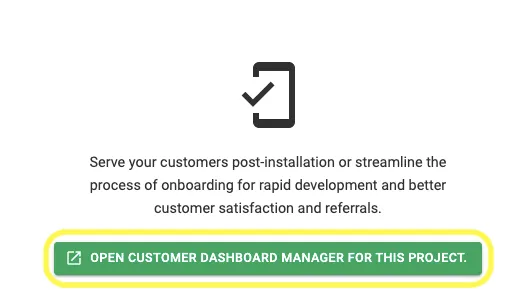
Step 1: Open that project and Go to Customer Dashboard Tab and Click on "Open Customer Dashboard Manager for this Project"
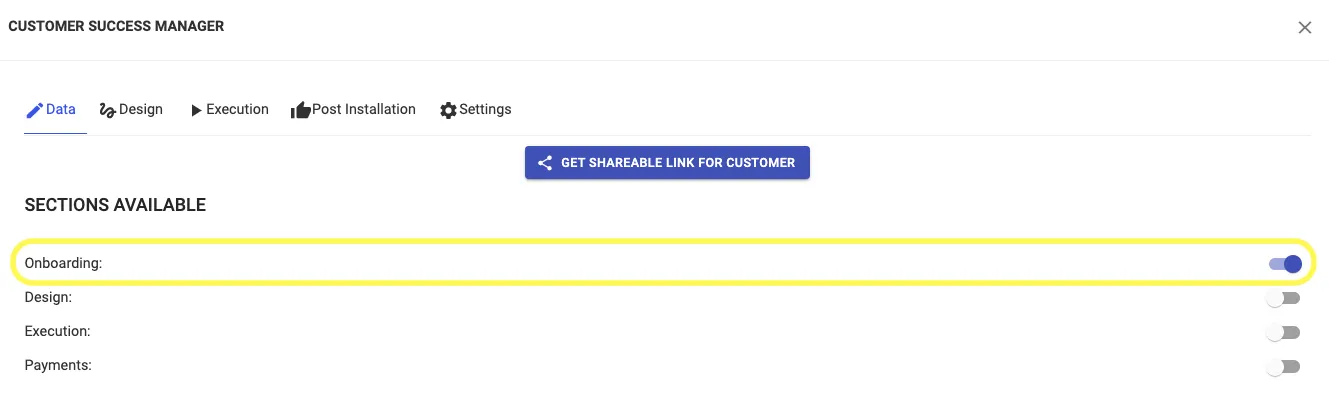
Step 2: Initialize Onboarding Stage by turning the toggle button on
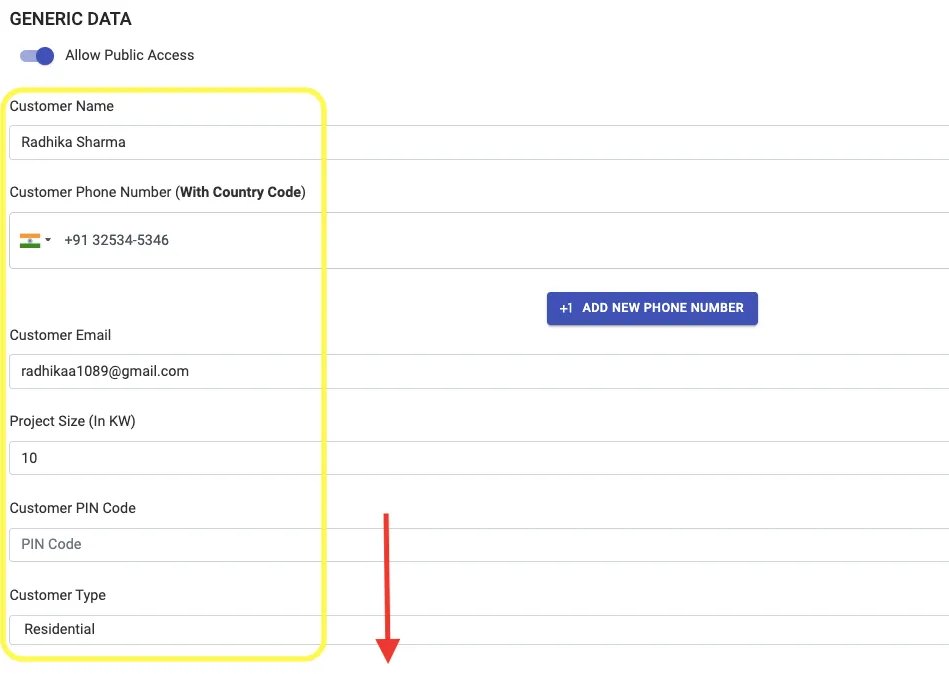
Scroll down to find Generic Data that both you and customer can fill. When customer uses the link you provided, they will be able to fill out all details for you and the same will be reflected on this page and can also be edited/filled up by you.
Once Onboarding stage is complete,
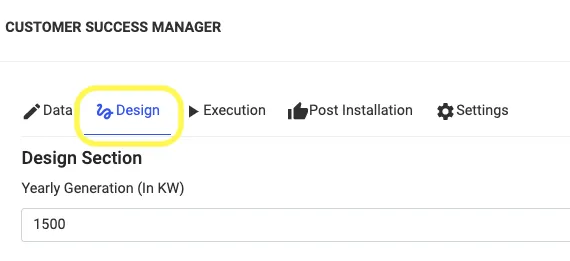
Step 3: Initialize Design Stage by turning the toggle button on

Once Design Stage is enabled,
Step 4: Go to Design Tab and Update/Upload details (like design images, proposals, and reports etc.) for the customer
Step 5: Go to the end of the page and Click on Update so that all uploaded data gets displayed on customers end
Once Design stage is complete,
Step 6: Initialize Execution Stage by turning the toggle button on
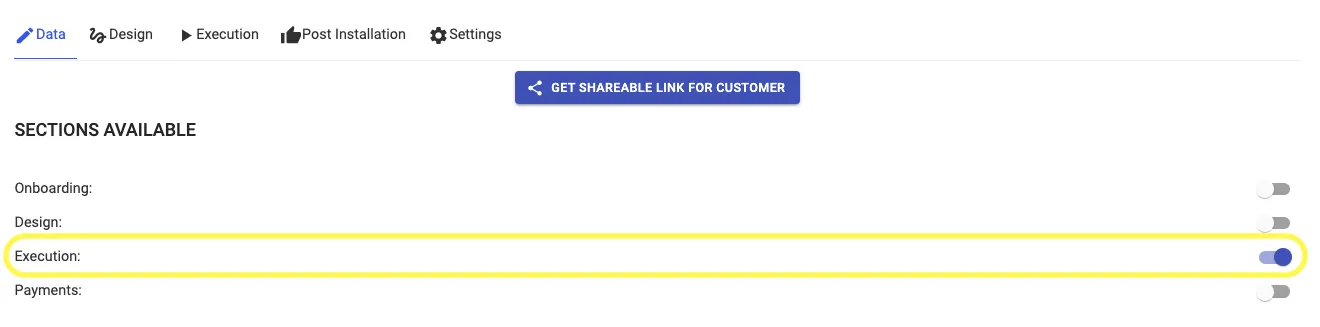
Once Execution Stage is enabled,
Step 7: Go to Execution Tab and Select a timeline preference and keep adding project updates as an when there is an Update.
(If you select Project management Gantt Chart and simultaneously update the Project Management Tempate in the Project Management Tab, then updates get displayed automatically as both tabs get linked)
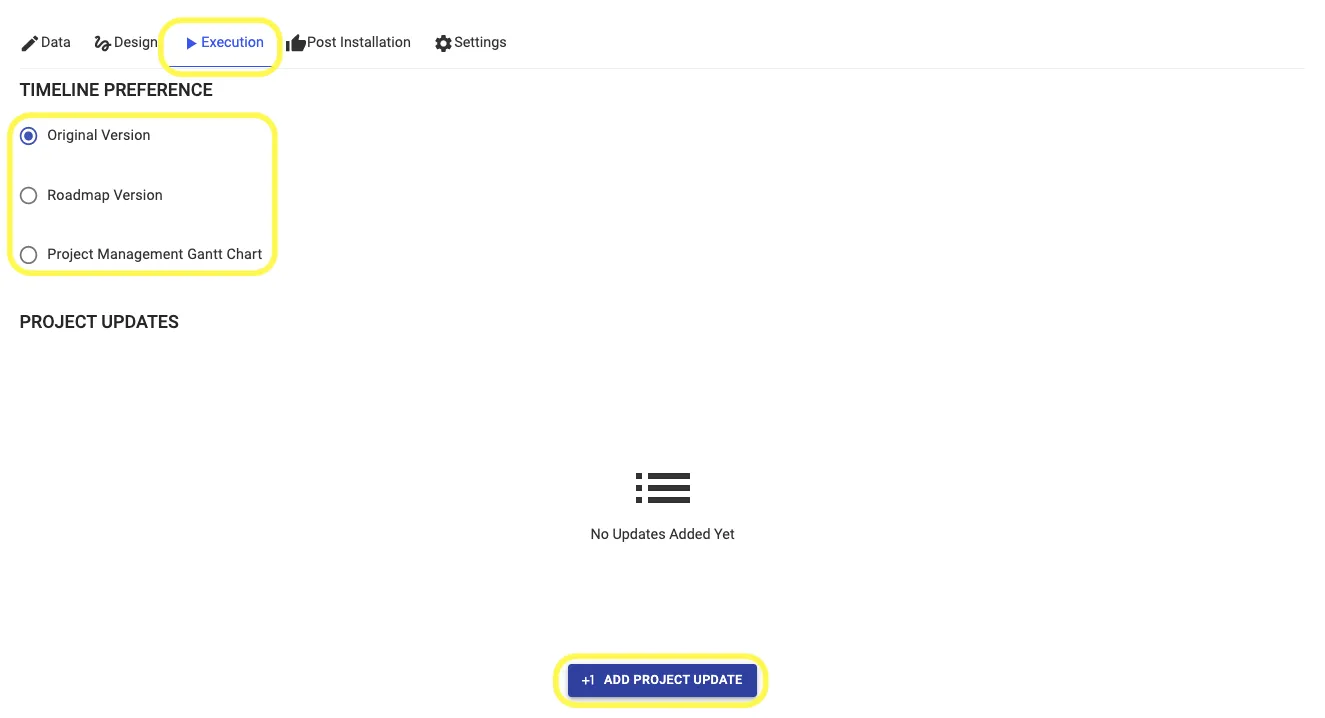
Step 8: Go to the end of the page and Click on Update Data so that all updates gets displayed on customers end
Once Execution stage is in progress/complete
Step 9: Initialize Payment Stage by turning the toggle button on
(Please Note: Payment Stage can be kept on while execution stage is still in progress and all payment details added in Payments Tab get linked with Customer Dashboard and get displayed to the customer)
